

Hello coders, In this article I’m going to show you that how you can install VueX and use it inside your VueJS 3.0 project.
So, we’re going to install Vuex in latest version VueJS, which is Vue.JS 3.0. Before that, let’s discuss first what is VueX and Why you should use it.
What is Vuex?
Vuex is a state management package that helps you to manage your states, actions, etc outside the component. For example, Assume you have multiple components in your app and now you want to share data across components.
In such cases, You have use custom events and methods Or Provide and inject method to share your data across components. And It’s more tedious task when you want to share your state with you sibling components. You can solve this problem with help of Vuex.
Vuex will be more useful when you are developing Medium or Large scale SPAs. In Vuex, We basically define our states in separate store.js. This state will be shared across multiple components. And there also few things which will help you to change the state of your data, e.g: Getters, mutations and actions.
Vuex help you to manage and share you state across multiple components without using props, custom events, provide or inject method.
How to install and Setup you Vuex?
To install vuex for VueJS 3, you have to type the following command in your terminal.
npm install vuex@next --saveYou can also see this command from it’s official website.
Once you have installed it, then move to the next step. Now we’re going to set up our Vuex store. Where we will manage our state, getters and all that.
How to set up Vuex ?
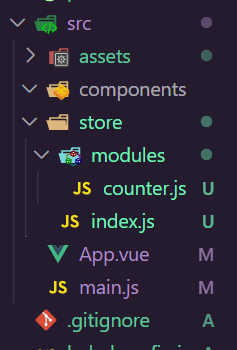
First of all create a new “store” folder inside your “src” folder. Then Inside this store folder, You need to create two things: modules(folder) and index.js(file). Then inside your modules(folder), create a file called counter.js(You could choose any name you want).
Well, this structure is optional, But I highly recommend you to use it. Because When your app grows up then you can manage them easily with separate modules.
Now open you index.js file and add following code.
import { createStore } from 'vuex';
import counter from './modules/counter';

const store = createStore({
    modules: {
        counter
    },
});

export default store
Inside your store/index.js, First of all, you have to import two things: createStore function from ‘vuex’ and then you counter.js file, which we have placed in our modules folder. Now you have to create a store variable, where we will store of createStore({}) object. This createStore function takes one object.
Well If you only have one store, then you can also define your state, getters, action, and mutations all here. But We’ve already created our counter.js file, where we will define our store(state, getters, etc). So, all the external store you defines will be imported inside modules: { store(here counter) } property.
Now open you counter.js file and then defines all your required variables you want to use e.g. state, getters mutations and actions.
const state = {
    counter: 10
};

const getters = {
     getValue(state) {
        return state.counter
    }
};

const mutations = {
    mutateFun(state) {
        return state.counter = state.counter * 2
    }
};

const actions = {
    increment: ({commit}) => {
        commit('mutateFun')
    }
}

export default {
    state,
    mutations,
    getters,
    actions
}
Now here, define your state, mutations, getters and action and then export it. So, that you could import this file inside your store/index.js file.
State:
State is same as data of your Vue app. But you can share this data across multiple components without using any custom events, props or provide and inject method.
You can access this data inside your VueApp like this.
By using $store: {{ $store.state.counter(module_name, if any).statename }}
<p>{{ $store.state.counter.counter }}</p>But mostly, we use getters to access a particular state from the store. You can also use { mapState } helper if you want.
Getters:
Getters is work like computed properties. So, whenever you want computed value on state data, In such cases you can use getters. Like I said first way to access state inside your app is $store.state.module.state_variable_name.
Here, you can use getters to return this value, So, that later you could access it in short and simple code.
getters = {
    getValue(state) {
        return state.counter
    }
}
We define getters the same as we define computed properties. In getters, your function takes one argument, which is state itself. So, that you could access your state using state.state_name(variable).
You can access getters same way as you accessed your state. Only difference is that you don’t have to specify name of current store in which you are. Because all the getters name should be unique all across stores.
$store.getters.getter_nameAlso you can use { mapGetters } helper inside you VueApp if you want. But I think this is simple way without importing anything.
Mutations And Actions:
Mutations and actions are kind of methods. They acts on the events and then it changes or mutates original value of your state. Well, you can commit these mutations inside your VueApp directly on sort of events, but we use Actions to commit particular mutations on specific actions.
Because there will be some time when you fetches data from, In such cases Actions are capable of calling asynchronous function. So, that after waiting sometimes you could commit your specific mutations you want.
Defining Mutations:
mutations = {
     mutateFun(state) {
        return state.counter = state.counter * 2
    }
}
These mutations takes one argument which state, So that we could change or mutate these states. Well, these mutations also takes payload to carry data. We will talk about payloads later
$store.commit('mutation_name')We use commit method to commit mutation. Most of the time we will use actions that will act upon sort of events and then those actions defined functions will commit these mutations.
Defining Actions:
const actions = {
    increment: ({commit}) => {
        commit('mutateFun')
    }
}
These action takes one object as an argument, which contains commit method. So, that we could commit our mutations as I said.
$store.dispatch('Action_name')We use dispatch method to call Actions. As I said actions are capable of handling async functions. Well action also takes payload to carry data(if you want).
Now Inside your App.vue, You can define use your store variables.
<template>
  <div>
    <!-- State Data -->
    <p>state: {{$store.state.counter.counter}}</p>
    <!-- Getters -->
    <p>getters: {{$store.getters.getValue}}</p>
    <!-- Action -->
    <button @click="$store.dispatch('increment')">Action</button>
  </div>
</template>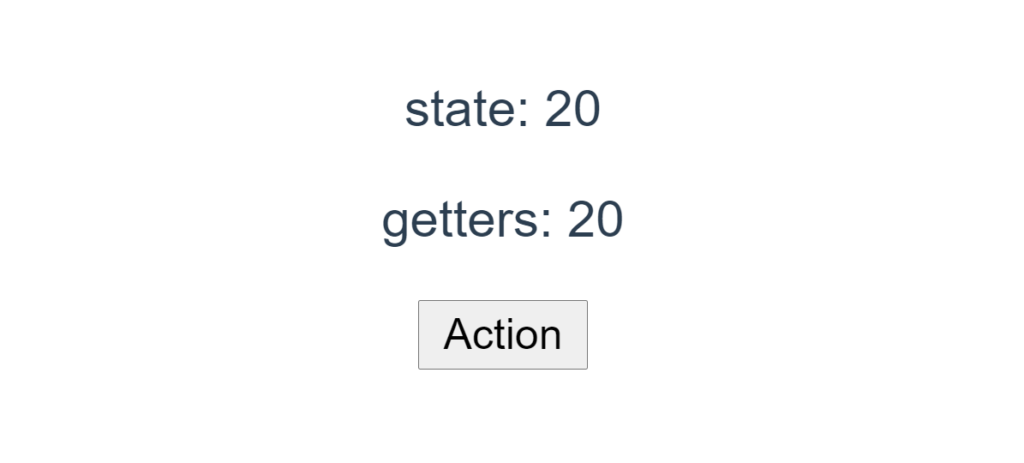
Now Here In app.vue file, You could see that we used state or getters to access data. And we also dispatched an action increment. And Now this increment action will commit our mutateFun mutation.
Now you can call these mutations, state, getters and action anywhere across your Vue Application.
You may also like: Django REST Framework (FULL GUIDE)
So, I hope you all liked this article. If yes then please don’t forget to share this article with your friends. You can also subscribe to our blog to get future notifications from us.
Thanks to read…