Hey Coders, If you’re here then definitely you have a good know about Django framework and How it works. In this article, I’m going to explain your Django Rest Framework. Basically, we’ll discuss what is Django Rest Framework and how you can create a Rest API with this Rest Framework.
What is Django Rest Framework?
Django rest framework is a toolkit or package that allow you to create restful Web API with an ease. It’s easy to use if you’ve knowledge Django framework. Because we all know that API is an interface that help us to to interact with other software’s in the market. So, having a knowledge of API will be good for you as a developer.
Creating Simple Django Project:
Project Overview* – First let’s create a simple Django app, which basically shows us List of movies, and later on we will create our rest api with Django Rest Framework. In this Django App, we will have different type of model fields e.g title, category, date_released and price. Which we will fetch under the table element inside the main template.
To start a new project in a Django, simply type a following command under the terminal. Let’s create a project called “movie_api“
django-admin startproject movie_apiAnd then it will create a folder called movie_api, which contains your project. Here, I’m using PyCarm IDE because It’s basically designed for Python related task. Now get inside your “movie_api” folder by using “cd movie_api” command in terminal. Rrun the following code to check whether you project working properly or not.
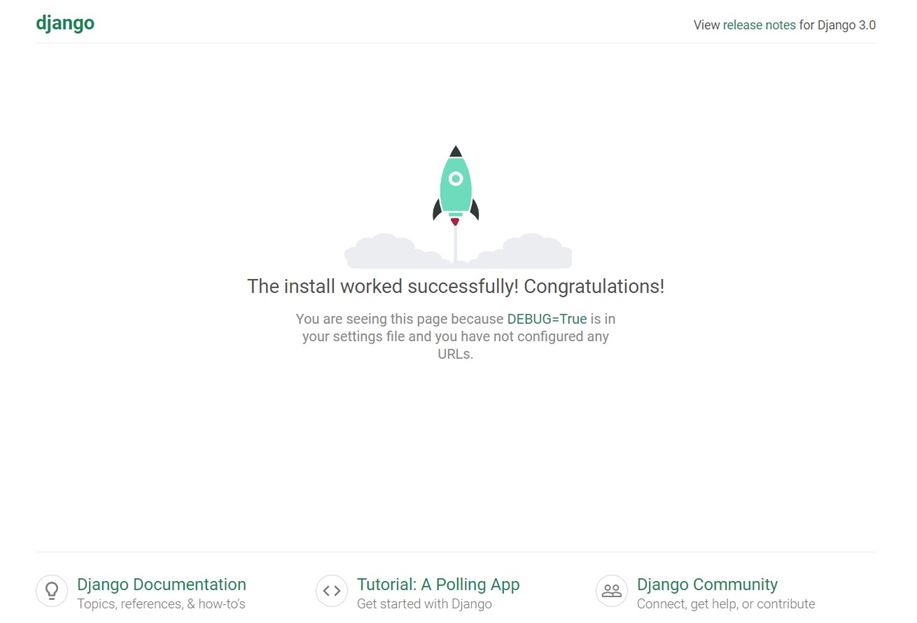
python manage.py runserverGo to the browser and enter http://127.0.0.1:8000/ url in address bar. If you will see something like below then congrats, you’ve successfully created your project.
Creating an App:
Now, Let’s create an app, where we will configure our files like models.py, views.py, etc. Let’s create your app by using following command:
python manage.py startapp movieRemember one thing, Our main project folder name is “movie_api” and the app we just created is called “movie“. Now, once you’ve created your app then you have to this list this app under movie_api/settings.py. Here, under the array INSTALLED_APPS, you need to add your newly created app.
movie_api/settings.py
INSTALLED_APPS = [
    'django.contrib.admin',
    'django.contrib.auth',
    'django.contrib.contenttypes',
    'django.contrib.sessions',
    'django.contrib.messages',
    'django.contrib.staticfiles',
    'movie',  # Newly Created app
]
Now let’s create our model field that we needed for our movie list.
movie/models.py
from django.db import models

class Movie(models.Model):
    title = models.CharField(max_length=100)
    category = models.CharField(max_length=100, blank=True)
    date_released = models.DateField()
    price = models.IntegerField()

    def __str__(self):
        return self.title
Now run the migration and migrate by using following command in the shell.
python manage.py makemigrations

and then

python manage.py migrate
Now, To display your database under you django administration, you have to configure your movie/admin.py file.
movie/admin.py
from django.contrib import admin
from .models import *

admin.site.register(Movie)
Now, Let’s configure our django administration… To access your Django admin panel, you need to create a superuser account. To create a superuser to access django admin panel, type following command in the shell or terminal.
python manage.py createsuperuserNow, you type the above command then it will ask you to enter username, email and passwords. Just follow the instruction and create your account. Once you’ve created your superuser then you can access django admin panel.
To access django admin panel, Go to the address 127.0.0.1:8000/admin.
Now login with your username and password and then it will redirect you to the dashboard look like this:
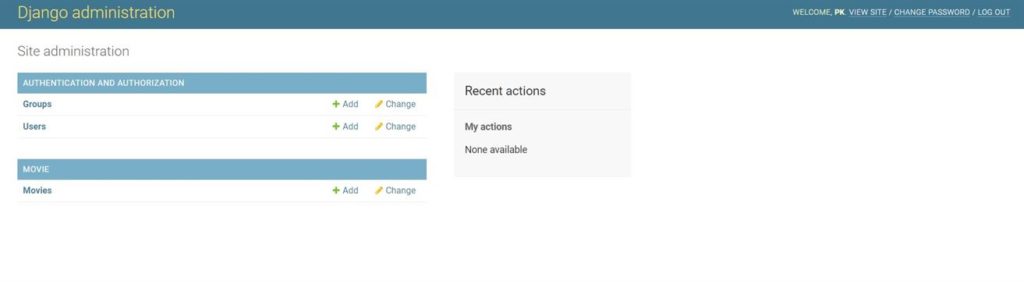
Now Let’s create some objects through admin panel. Later on, we will create our REST API of these data by using Django Rest Framework.
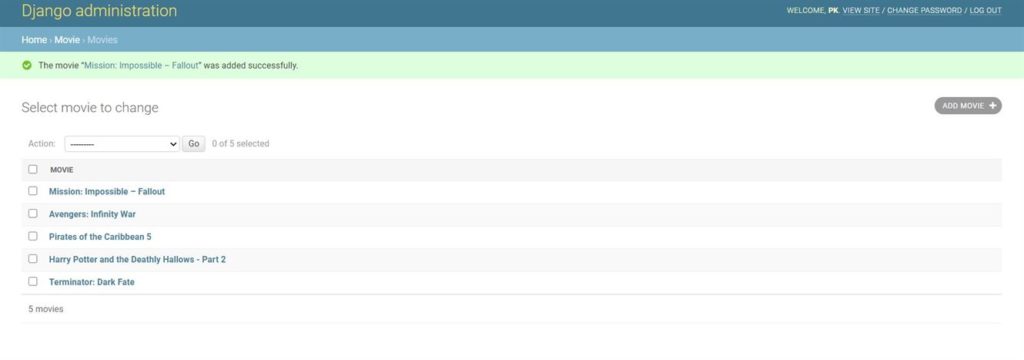
In the above image, you can see that I just created 5 Movie object, and now we will display it on our homepage. After then we will create an API of these data. But before that let’s configure our urls.py and templates file
Now create a urls.py file under movie app and link this urls.py with movie_api/urls.py
movie_api/urls.py
from django.contrib import admin
from django.urls import path, include

urlpatterns = [
    path('admin/', admin.site.urls),
    path('', include('movie.urls')),
]
And now let’s configure our main app urls.py file.
movie/urls.py
from django.urls import path
from movie import views

urlpatterns = [
    path(' ', views.home, name="home"),
]
Now Let’s create our home function under the movie/views.py. Where we will call our home.html template that we will create after configuring views.py file.
movie/views.py
from django.shortcuts import render
from .models import *

def home(request):
    movies = Movie.objects.all()
    context = {
        'movies': movies
    }
    return render(request, 'movie/home.html', context)
Now let’s create a folders called templates/movie/ inside your movie app folder. And then create a file called home.html. Because here our main is about creating REST API, therefore I will not waste too much time too design this home template. In this home.html, we will have simple table with bootstrap look. where we will fetch our Movie objects.
movie/templates/movie/home.html
<!DOCTYPE html>
<html lang="en">
<head>
    <meta charset="UTF-8">
    <title>Movie REST</title>
    <link rel="stylesheet" href="https://stackpath.bootstrapcdn.com/bootstrap/4.5.0/css/bootstrap.min.css" integrity="sha384-9aIt2nRpC12Uk9gS9baDl411NQApFmC26EwAOH8WgZl5MYYxFfc+NcPb1dKGj7Sk" crossorigin="anonymous">
</head>
<body>

<!--Navbar-->

<nav class="navbar navbar-expand-lg navbar-dark bg-dark">
    <div class="container">
  <a class="navbar-brand" href="#">Movie API</a>
  <button class="navbar-toggler" type="button" data-toggle="collapse" data-target="#navbarNav" aria-controls="navbarNav" aria-expanded="false" aria-label="Toggle navigation">
    <span class="navbar-toggler-icon"></span>
  </button>
  <div class="collapse navbar-collapse" id="navbarNav">
    <ul class="navbar-nav">
      <li class="nav-item active">
        <a class="nav-link" href="#">Home <span class="sr-only">(current)</span></a>
      </li>
      <li class="nav-item active">
        <a class="nav-link" href="#">API</a>
      </li>
    </ul>
  </div>
        </div>
</nav>


<div class="container">
    <div>
    <h1>Movies Table</h1>
        <table class="table table-striped table-dark">
      <thead>
        <tr>
          <th scope="col">Name</th>
          <th scope="col">Category</th>
          <th scope="col">Release Date</th>
          <th scope="col">Price(INR)</th>
        </tr>
      </thead>
      <tbody>
      {% for movie in movies %}
        <tr>
          <th scope="row">{{movie.title}}</th>
          <td>{{movie.category}}</td>
          <td>{{movie.date_released}}</td>
          <td>{{movie.price}}</td>
        </tr>
      {% endfor %}
      </tbody>
    </table>
    </div>
</div>

</body>
<script src="https://code.jquery.com/jquery-3.5.1.slim.min.js" integrity="sha384-DfXdz2htPH0lsSSs5nCTpuj/zy4C+OGpamoFVy38MVBnE+IbbVYUew+OrCXaRkfj" crossorigin="anonymous"></script>
<script src="https://cdn.jsdelivr.net/npm/[email protected]/dist/umd/popper.min.js" integrity="sha384-Q6E9RHvbIyZFJoft+2mJbHaEWldlvI9IOYy5n3zV9zzTtmI3UksdQRVvoxMfooAo" crossorigin="anonymous"></script>
<script src="https://stackpath.bootstrapcdn.com/bootstrap/4.5.0/js/bootstrap.min.js" integrity="sha384-OgVRvuATP1z7JjHLkuOU7Xw704+h835Lr+6QL9UvYjZE3Ipu6Tp75j7Bh/kR0JKI" crossorigin="anonymous"></script>
</html>
Now run your server again and you will see something like this.
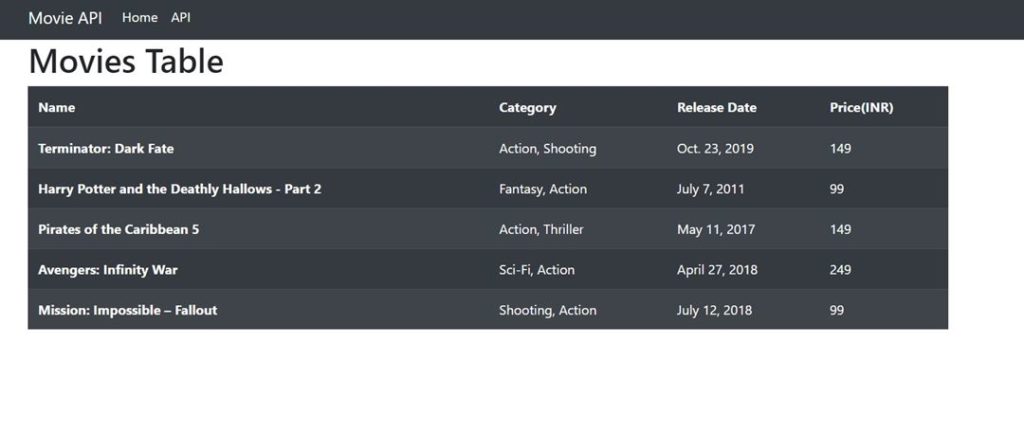
In the above, you can see that our table fetched all the data from our model objects. Now we’re going to build main section our blog. Now, we can create our REST API by using Django Rest Framework.
REST API(Creat,Read Update, Delete) – Django Rest Framework:
Now, we will create our REST API and our url will be:
- View API: “/api”
- Create API: “/api/create”
- Update API: “/api/update/id”
- Delete API: “/api/delete/id”
Now let’s begin our REST API tutorial with installing and setup out Django Rest Framework.
Installing And Setup Django Rest Framework:
install django rest framework package by using following command-
pip install djangorestframeworkNow add ‘rest_framework’, inside your INSTALLED_APPS under the settings.py file.
INSTALLED_APPS = [
    'django.contrib.admin',
    'django.contrib.auth',
    'django.contrib.contenttypes',
    'django.contrib.sessions',
    'django.contrib.messages',
    'django.contrib.staticfiles',
    'movie',
    'rest_framework',
]
In Django Rest Framework, we’re using basically 4 types of requests i.e. GET, POST, PUT And DELETE. Now first, we’re going to create our view api that will show our all movie in structured format.
Under the movie/views.py, you need to import some module and classes.
from rest_framework.decorators import api_view
from rest_framework.response import Response
In above, you can see that we imported api_view, where we will define that what requests we will be use in view functions. And then in we imported Response, which will allow us to access the interface of Django rest framework.
Now, you need to create “serializers.py” file inside your movie folder. In serializers.py, we will define that which model we want to serialize.
movie/serializers.py
from rest_framework import serializers
from .models import Movie

class MovieSerializers(serializers.ModelSerializer):
    class Meta:
        model = Movie
        fields = '__all__'
In the above code, you can see that our code is much similar like model form. Where we have serialized all fields of our Movie model. Now import this file into your movie/views.py.
from .serializers import MovieSerializersNow, we’re ready to define our function and url to create REST API.
Creating API( READ):
Now, let’s create our Api, that will show list of our all movie in structured format. To create api, first we need to define a function under the views.py. First, Let me show you the function that I’ve defined to create api.
movie/views.py
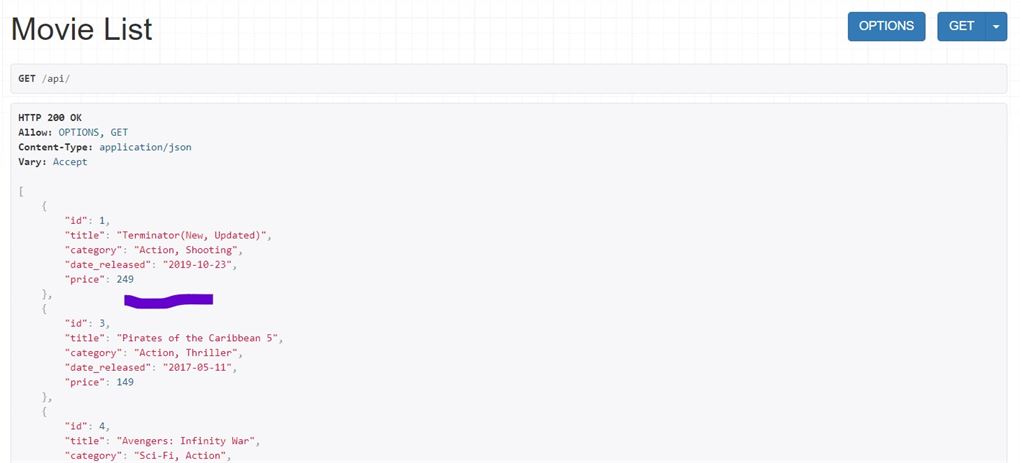
@api_view(['GET'])
def MovieList(request):
movies = Movie.objects.all()
serializer = MovieSerializers(movies, many=True)
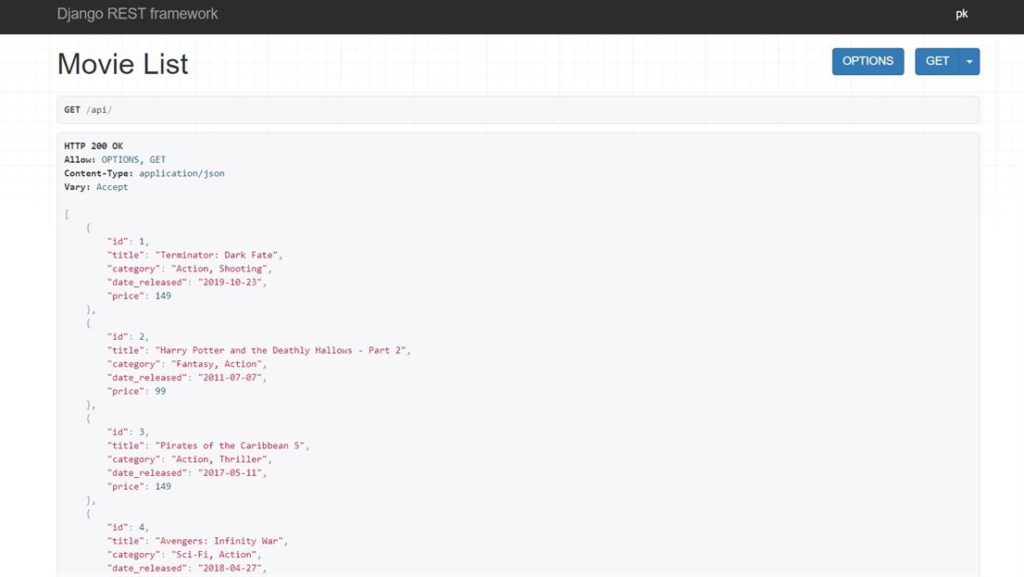
return Response(serializer.data)In the above MovieList function, we have use ‘GET’ request that will show you list, which is only readable. Under this, we called all the object that we want to define in our api. Then we used MovieSerializersn function, where we have defined movies variable. In this movies, we stored our all objects data, and then many=”true”, which means field that we want to display in our api list.
In the last, we simply returned a Response function that will use serializer variable to display this under Django Rest Framework. Now, we need to setup our url path, where we will define our path of this api. Add following path under urls.py file
movie/urls.py
path('api/', views.MovieList, name='api'),Now go to the respective url: https://127.0.0.1:8000/api and you will see your API of Movie list is created successfully like this:
API – Adding Object(CREATE)
To adding data through an API, we have to use POST response. Let me show you my code first then I’ll explain you.
movie/views.py
@api_view(['POST'])
def MovieCreate(request):
    serializer = MovieSerializers(data=request.data)

    if serializer.is_valid():
        serializer.save()
    return Response(serializer.data)
In the above code, we have used POST request and then we store requested data into serialized. And then later, if the form is valid then we will save it into our database. In the last, we returned Response objet as same as previous one.
Now add following url path into your movie/urls.py file
path('api/create/', views.MovieCreate, name="api_create"),Now Go to the url: https://127.0.0.1:8000/api/create, and then you will be see form like this:
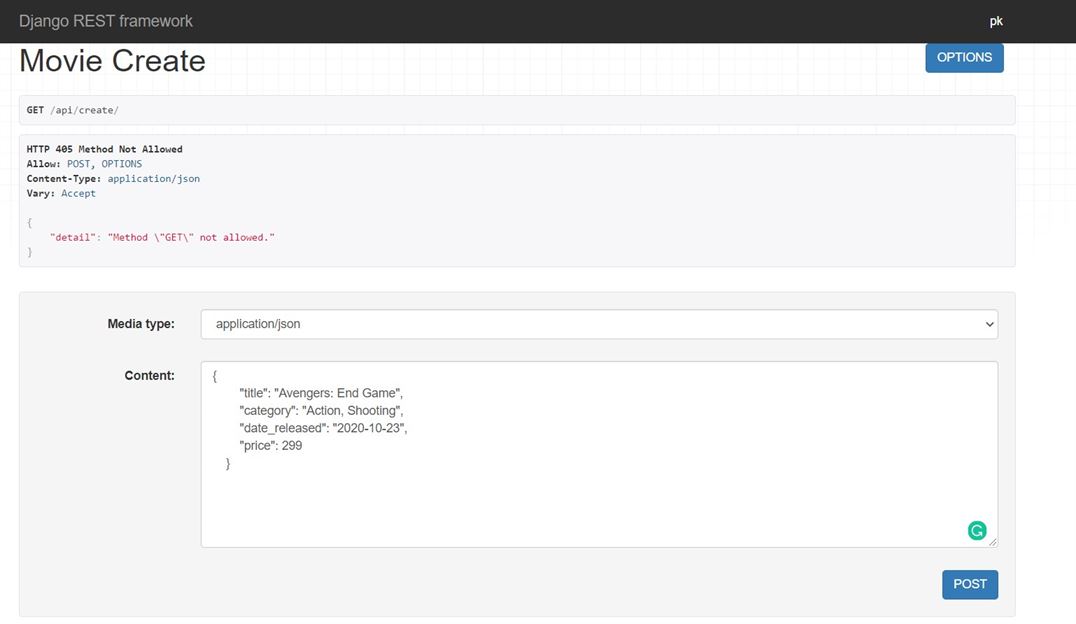
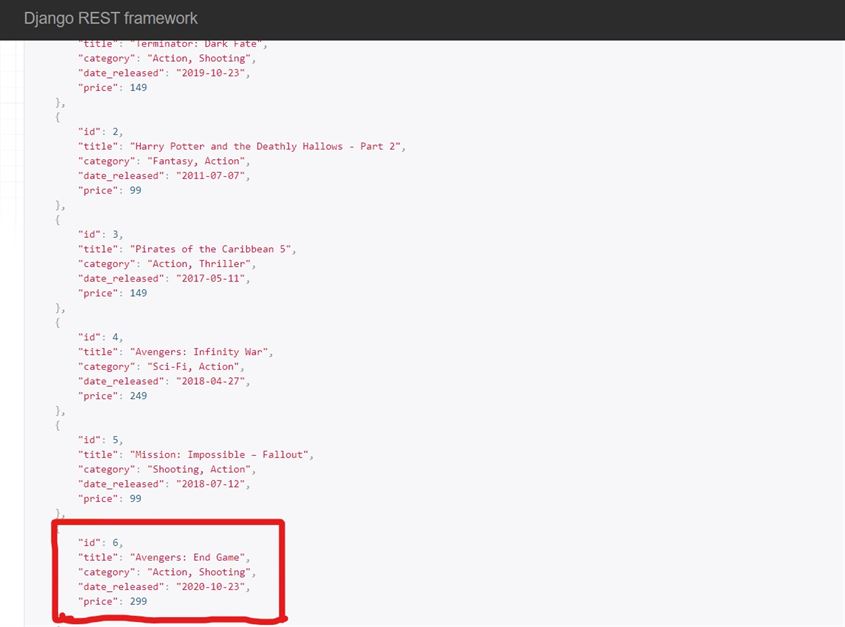
And then click on the post… It will add the data into database and display it into your api list like this:
API – Updating Object(UPDATE)
Now, Let’s update our data through REST Framework. First, let me show you my code and then I will explain you.
movies/views.py
@api_view(['POST'])
def MovieUpdate(request, pk):
    movie = Movie.objects.get(id=pk)
    serializer = MovieSerializers(instance=movie, data=request.data)

    if serializer.is_valid():
        serializer.save()
    return Response(serializer.data)
Here, we’re also using POST request, because we need to send data in order to update our data. It has same code structure like Creating, but here we need to open specific object using their “id”. Then we will enter our updated data and click on the post.
Now add following path to into your urls.py to access this function.
movie/urls.py
path('api/update/<str:pk>/', views.MovieUpdate, name="api_update"),In the above url path, you need to insert id of respective post in address bar, which data you want to update.
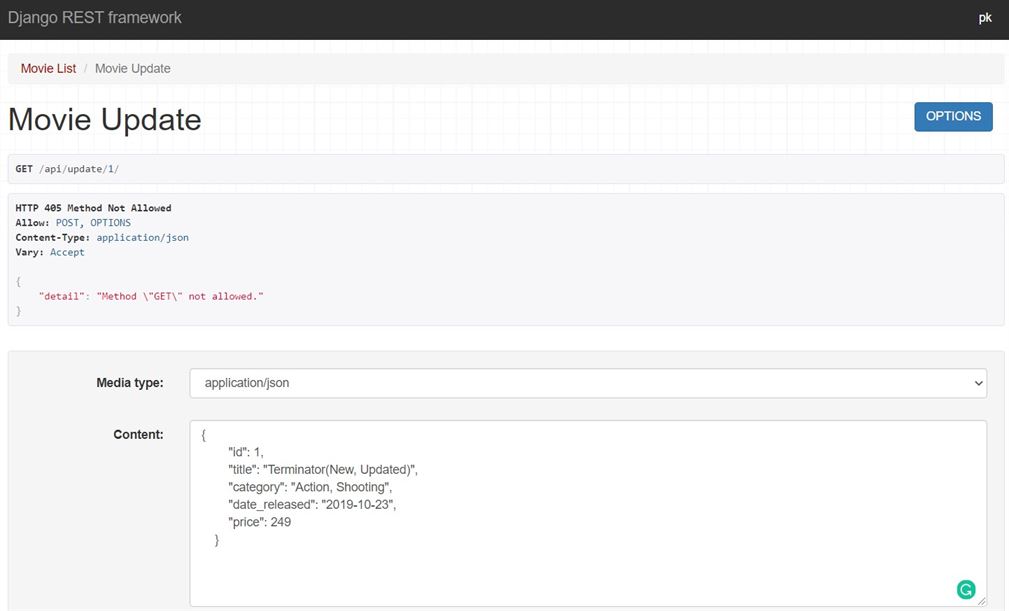
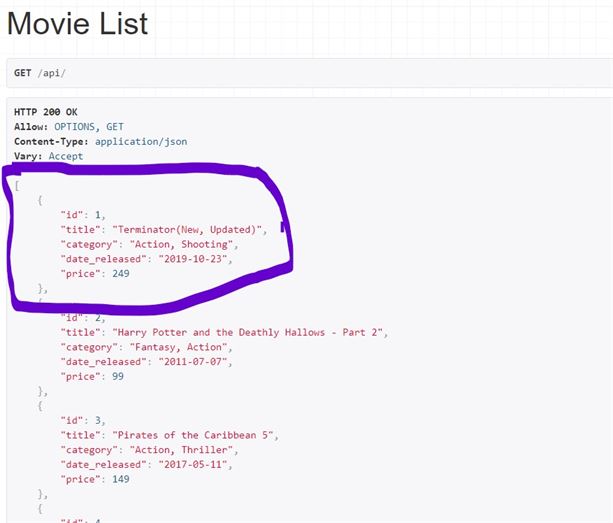
You can see in the above image that we’re updating our movie object with ‘id’=1. edit the data that you want to update and your data will be successfully updated.
API – Deleting Object(DELETE)
Now, we’re going to delete data through Django Rest Framework. But first let me show you my code.
movie/views.py
@api_view(['DELETE'])
def MovieDelete(request, pk):
    movie = Movie.objects.get(id=pk)
    movie.delete()
    return redirect('api')
In the above code, we have called ‘DELETE‘ request. Here, we don’t need to serialize our data. we just called an object through their id and stored it into movie variable. Now you need to call delete() function to delete your called object.
Now you need to add following url path to access delete function:
path('api/delete/<str:pk>/', views.MovieDelete, name="api_delete"),In place of <str:pk>, insert id no. of the object that you want to delete. Now go to the above url path and you will see page like this.
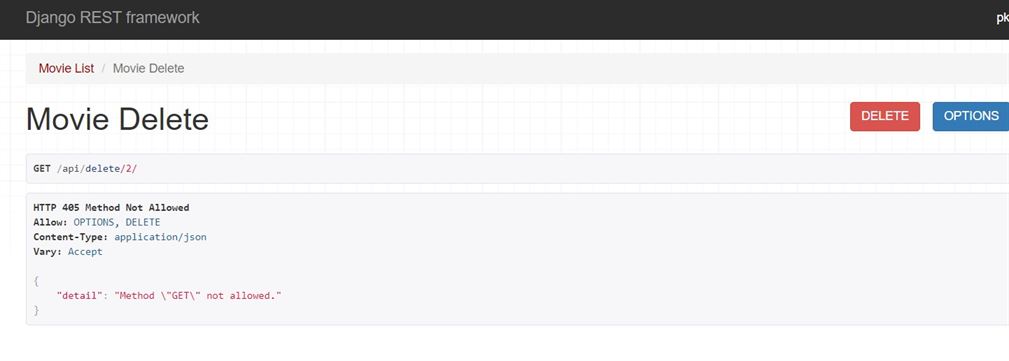
Your object is successfully deleted out of your database and Api list.
That’s it for today. If you want to learn more advance topic then you can follow Django REST Documentation: Click Here(To Read)
Read Also: Django authentication – Sign Up, Sign in And Log out(Read Here)
I’ve explained all the basic things and term that you need to understand in Django rest framework. Now you can learn more advance things in Django rest framework by using your curiosity.
If you liked this this article then please don’t forget to share this article with your friends and social media groups.
Thank’s To Read…
2 thoughts on “Django Rest Framework – Create REST API, Serializers, CRUD”