

Hey coders, today we’re going to see that you can add and upload images by using Django Model Form. Remember, It’s different than static images because we use static images just to display our images to somewhere on our website. But here, we want that anyone can upload images by using Django Model forms.
If you want to know the process of the Django image upload using Model form, then please read the full article till the end. In this article, I’ll only touch that topic which will be required for this image uploading process.
Django Image Upload(Tutorial):
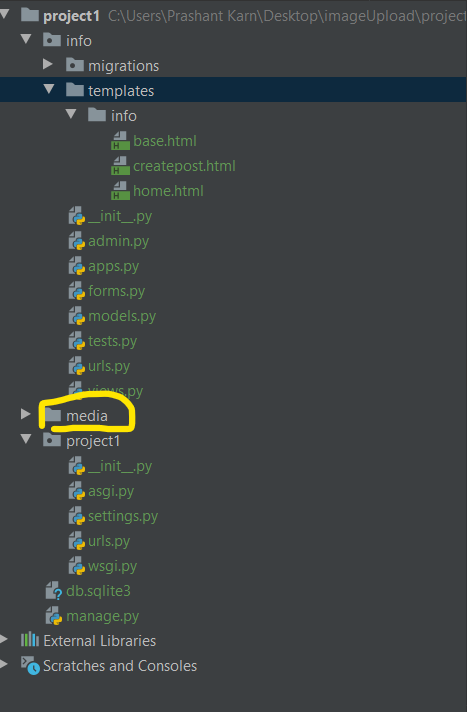
Description: First create a django blank project called “project1” by using the command : > django-admin startproject project1. Then create an app called “info”(any name you can keep) by using command: > python manage.py startapp info. Don’t forget to add this new app inside the INSTALLED_APPS section of settings.py.
Now inside your info folder, create two files – forms.py and urls.py(link it with main project1/urls.py). Now let’s begin.
1. Media Root and Url Setup
Now you need to set up and configure your media root and media url in settings.py. So, that whenever someone will upload any image that will be stored in that directory. But before that create a folder called ‘media’ inside your main project1. we will configure this folder to store uploaded images.
Now add following code Inside your project1/settings.py and then configure inside your project1/urls.py file.
project1/settings.py
MEDIA_ROOT = os.path.join(BASE_DIR, 'media')
MEDIA_URL = '/media/'
project1/urls.py
from project1 import settings   # Add
from django.conf.urls.static import static   # Add
from django.contrib import admin
from django.urls import path, include

urlpatterns = [
    path('admin/', admin.site.urls),
    path('', include('info.urls'))
] + static(settings.MEDIA_URL, document_root=settings.MEDIA_ROOT)
In above project1/urls.py, first import two files and then add “static(settings.MEDIA_URL, document_root=settings.MEDIA_ROOT)” after defining urlpatterns. It would connect the URL of uploaded images with media/ slug.
Now you’re ready to go.
2. Create Models
Now It’s time to create a model for our project. Here, I’m going to create a simple model called Post, where we will have two fields – title(CharField), image(ImageUpload).
info/models.py
from django.db import models

class Post(models.Model):
    title = models.CharField(max_length=100, blank=True)
    image = models.ImageField(upload_to='images/', blank=True)
In above code, we have defined two different fields, first one for title, In which we have a CharField. Then we have ImageField, In which I declared an argument upload_to=”images/”, which will gather all these uploaded images inside following this images/ directory.
Now makemigrations and then migrate it.
3. Create Model Form For Post Model
Now you need to create model form for Post Model. So, that we can create our Post objects by using this Post Model Form. Inside you info/forms.py, add following code.
from django import forms
from .models import *

class PostForm(forms.ModelForm):
    class Meta:
        model = Post
        fields = '__all__'
In the above code, you can see that I’ve created a Post form, where I’ve selected all the fields by using fields = “__all__”. Now we need to setup our info/views.py file.
4. Setting Up Views.py and Urls.py(info)
Now we need to configure our info/urls.py file. So, add following code to configure it.
info/urls.py
from django.urls import path
from info import views

urlpatterns = [
    path('', views.home, name="home"),
    path('create-post/', views.createpost, name="createpost")
]
In above, I’ve configured two different urls – home and /createpost. In home url, we will display all objects of Post Model. and In createpost, we will have our Post form, In which we will have two fileds char and image upload field.
Now let’s create home and createpost view function inside our info/views.py. So that our info/urls.py could render it.
info/views.py
from django.shortcuts import render, redirect
from .models import Post
from .forms import PostForm


def home(request):
    posts = Post.objects.all()
    context = {
        'posts': posts
    }
    return render(request, 'info/home.html', context)


def createpost(request):
    form = PostForm()
    if request.method == 'POST':
        form = PostForm(request.POST, request.FILES)
        if form.is_valid():
            form.save()
        return redirect('home')
    return render(request, 'info/createpost.html', {'form': form})
In home function,
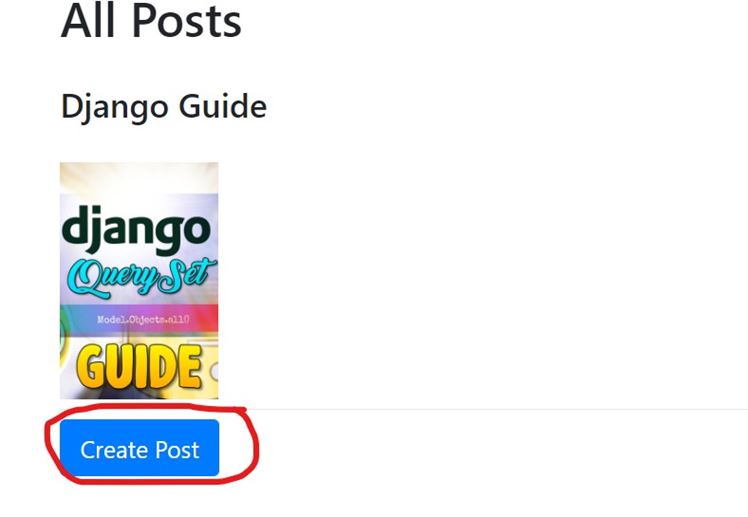
we simply rendered all the objects out of Post Model and we will display it inside home.html file e.g
<h1>All Posts</h1>
<br>
{% for post in posts %}
   <h3>{{post.title}}</h3><br>
   <img src="/media/{{post.image}}" width="auto" height="200px"/>
<hr class="my-2">
{% endfor %}

<a role="button" class="btn btn-primary btn-lg" href="{% url 'createpost' %}">Create Post</a>
In createpost function,
we’ve called our PostForm and stored it inside form variable. Now whenever user would enter the Submit button then the Post method will be executed. So, whenever Post method will be executed it will collect all the post request data.
Note: we’re uploading images(media files), that’s why we need to add request.FILES inside our PostForm(), when request.method == ‘POST’
form = PostForm(request.POST, request.FILES)
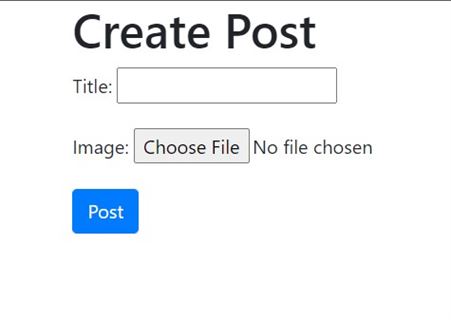
Then if form request will be valid then it will simply create and save the post. and Then it will redirect you to the homepage section. But If it would be “GET” method then it will simply return PostForm() to you. we declared our form inside our “createpost.html” file. like
{% extends 'info/base.html' %}
{% block content %}

<h1>Create Post</h1>

<form method="post" enctype="multipart/form-data">
    {% csrf_token %}
    {{form.as_p}}
    <button type="submit" class="btn btn-primary">Post</button>
</form>
{% endblock %}
Warning:
Don’t forget to add enctype=”multipart/form-data” inside your <form> tag like <form method=”post” enctype=”multipart/form-data”></form>. If you wouldn’t do that then it will not render the image file through Model form.
Now go inside your terminal and run your server by using:
python manage.py runserverIn home page you will see something like this:
And Inside your createpost page, you will see this form:
Also read: How to create Restful Api with Django Rest Framework(Beginner’s Guide)
So there would be basically two types of error that you might have encounter:
- If you would forget to add request.FILES inside your PostForm() inside POST method.
- If you would forget to add enctype=”multipart/form-data inside your form tag.
I hope you have satisfied with this article and got your answer related to Django Image Upload problems. If you liked this article then please don’t forget to follow our blog.
Thank’s to read…