

Hello coder’s, In this article I’m going to explain you how you can apply search filter by using Django filter package. Django filter is one of the most popular package that you can use to build custom search apply. In which, you can apply your searches as per you model attributes.
If you want to know how to use django filter or apply search functionality inside your django web app, then read this till the end. And by the end of this article, you will have proper idea about how this filter package works.
Django-Filter Guide:
To explain this django-filter, I’m going to create basic django project. where we will have few model attributes e.g title and text. We will have only two model attributes on which we will be apply our filters. From now on, follow up each and evey step very carefully.
1. Setup And Create Django Project
I’m going to create my django project inside my virtual environment. First, we have to create our virtual env for our project. But before that create a directory and get inside that directory and type following command to create virtual env.
pipenv installNow activate your virtual environment by using “pipenv shell” in cmd. After that, we will install our django in venv. you can skip above step if you’re not using virtual environment for your project.
pipenv install djangoRemember, I’m using pipenv command to install packages, but if you’re not using virtual environment then you have to use pip command for that e.g pip install django.
Now let’s create our project, because I want create my project files inside the same directory and don’t want any separate root folder. Because that will be redundant in this case.
django-admin startproject movieclub .I’ve created a django project named movieclub. Now let’s run this project by using following command:
python manage.py runserver
So, you can see our project is working properly.
2. Create an App For Your Project and Add
Now we need to create an app for our project.
python manage.py startapp movielistNow add this mvoielist app inside INSTALLED_APPS within movieclub/settings.py file:
INSTALLED_APPS = [
    'django.contrib.admin',
    'django.contrib.auth',
    'django.contrib.contenttypes',
    'django.contrib.sessions',
    'django.contrib.messages',
    'django.contrib.staticfiles',
    'movielist',
]
3. Create Models
Now, we have to create models, so, that we can apply our django filters on that model attributes. Here, I’m going to create Model called Movie inside movielist/models.py. In which, we will have two attribute e.g title and content:
from django.db import models

class Movie(models.Model):
    title = models.CharField(max_length=100)
    content = models.TextField()

    def __str__(self):
        return self.title
4. Defining Views.py file
Now let’s create our views.py file and let’s define function. Inside this function we will retrieve our Movie model objects.
from django.shortcuts import render
from .models import Movie

def index(request):
    movies = Movie.objects.all()
    context = {
        'movies': movies,
    }
    return render(request, 'movielist\index.html', context)
In the above code, we retrieved our Movie objects out of Movie model.
5. Urls.py File Setup
Now we need to setup our urls.py file, I’m going to configure my urls.py inside this movielist app. You can configure it differently if you want.
First, Let’s first configure our main urls.py file inside movieclub folder:
from django.contrib import admin
from django.urls import path, include

urlpatterns = [
    path('admin/', admin.site.urls),
    path('', include('movielist.urls')),
]
Now, create urls.py inside movielist app and then configure it with main urls.py file:
from django.urls import path
from movielist import views

urlpatterns = [
    path('', views.index, name="home"),
]
In the above urls.py file, You can see that I’ve imported index views function that we’d defined inside our views.py.
6. Creating Template
We have to create index.html template so that our index views function can render it easily. You have to create separate templates folder inside your movielist folder. and then create again folder called movielist folder. Now inside this, you have to create your index.html file.
<!DOCTYPE html>
<html lang="en">
  <head>
    <!-- Required meta tags -->
    <meta charset="utf-8" />
    <meta
      name="viewport"
      content="width=device-width, initial-scale=1, shrink-to-fit=no"
    />

    <!-- Bootstrap CSS -->
    <link
      rel="stylesheet"
      href="https://stackpath.bootstrapcdn.com/bootstrap/4.5.2/css/bootstrap.min.css"
      integrity="sha384-JcKb8q3iqJ61gNV9KGb8thSsNjpSL0n8PARn9HuZOnIxN0hoP+VmmDGMN5t9UJ0Z"
      crossorigin="anonymous"
    />

    <title>Movie Club</title>
  </head>
  <body>
    <div class="container mt-5">
      <h1>Movie List</h1>
      <hr />
      {% for movie in movies %}
      <div class="card bg-dark text-white mb-3">
        <div class="card-header"><h1>{{movie.title}}</h1></div>
        <div class="card-body">{{movie.content}}</div>
      </div>
      {% endfor %}
    </div>

    <!-- Optional JavaScript -->
    <!-- jQuery first, then Popper.js, then Bootstrap JS -->
    <script
      src="https://code.jquery.com/jquery-3.5.1.slim.min.js"
      integrity="sha384-DfXdz2htPH0lsSSs5nCTpuj/zy4C+OGpamoFVy38MVBnE+IbbVYUew+OrCXaRkfj"
      crossorigin="anonymous"
    ></script>
    <script
      src="https://cdn.jsdelivr.net/npm/[email protected]/dist/umd/popper.min.js"
      integrity="sha384-9/reFTGAW83EW2RDu2S0VKaIzap3H66lZH81PoYlFhbGU+6BZp6G7niu735Sk7lN"
      crossorigin="anonymous"
    ></script>
    <script
      src="https://stackpath.bootstrapcdn.com/bootstrap/4.5.2/js/bootstrap.min.js"
      integrity="sha384-B4gt1jrGC7Jh4AgTPSdUtOBvfO8shuf57BaghqFfPlYxofvL8/KUEfYiJOMMV+rV"
      crossorigin="anonymous"
    ></script>
  </body>
</html>
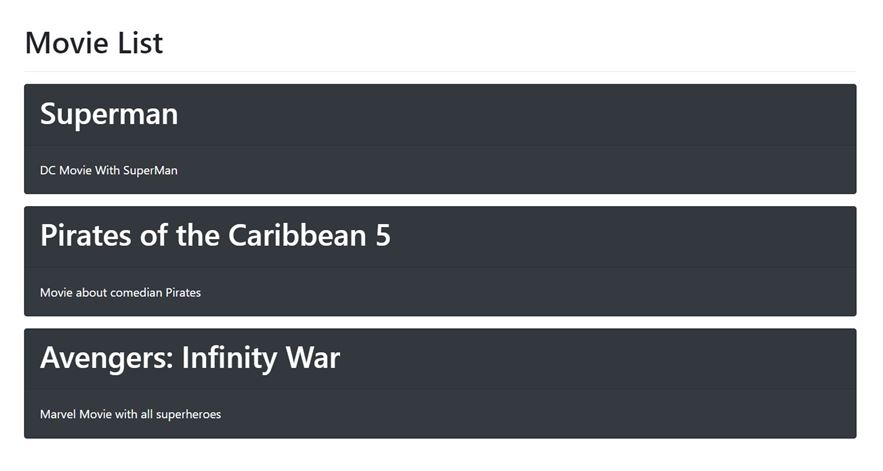
In the above template, I’ve rendered all data by using for loop. But we haven’t any data right now. So, let’s create some first. First, you have to create superuser by using the following command.
python manage.py createsuperuserI’ve added some data and now my page something look like this:
Installing And Implementing Django Filter:
Now we need to install django filter package by using following command. So, that we can use it in our project. To install django filter type following command in your shell
pipenv install django-filter
Now add this ‘django_filters’ inside your INSTALLED_APPS to let the project know that you’re going to use it.
INSTALLED_APPS = [
    'django.contrib.admin',
    'django.contrib.auth',
    'django.contrib.contenttypes',
    'django.contrib.sessions',
    'django.contrib.messages',
    'django.contrib.staticfiles',
    'movielist',
    'django_filters',
]
Now create filters.py file inside you movielist folder and then type following code.
import django_filters
from .models import Movie
from django_filters import CharFilter


class MovieFilter(django_filters.FilterSet):
    title = CharFilter(field_name="title", lookup_expr='icontains')

    class Meta:
        model = Movie
        fields = ['title']
I the above code, we imported django_filters, Movie and CharFilter. django_filters will allow you to create filter form and CharFilter is type of field that we are going to define in our form. Creating a filter form is most similar like creating Model Forms.
We’ve created MovieFilter form and Inherited it from django_filters.FilterSet. Then we have a title attribute which is a type of Char Field. we defined our title attribute by using CharFilter. Inside this CharFilter, we have a argument called field_name=””. Inside this field_name, we have to type then name of model Movie model field on which we want to apply our filter. After that we defined second argument which is lookup_expr=”icontains”. icontains removes case sensitivity.
Now render this Movie Filter form inside your views.py and then render it on your template.
from django.shortcuts import render
from .models import Movie
from .filters import MovieFilter


def index(request):
    movies = Movie.objects.all()
    myFilter = MovieFilter(request.GET, queryset=movies)
    movies = myFilter.qs
    context = {
        'myFilter': myFilter,
        'movies': movies,
    }
    return render(request, 'movielist\index.html', context)
In the above code, we importer MovieFilter form from filters.py file. After that we created an instance of MovieFilter Form, where we defined the type of request that this form will get. Then second argument we have queryset=””, where we put our list of movie objects. Now we need to render this our in our template. Paste following code anywhere inside your template to display your search form.
<form method="get">
   {{myFilter.form}}
</form>
Now run your server again and search your queries inside that filter form.

If you still have any problem, then this GitHub repository:
GitHub RepoRead also: Connect PostgreSQL database with Dajngo
I hope you liked this article If yes, then please don’t forget to share it with your friends.
Thanks to visit…