Hello folks, I hope you all are doing good. In this article, I’m going to show you how you can create Chrome Extension with Vue.JS framework. A chrome extension can help you to enhance your browser experience. Usually, you can build a Chrome Extension just by using Vanilla JS, HTML and CSS by following Google Official Docs on extension development.
But here I’m gonna show you the method that will be much easier as compare the docs(If you know VueJS). And most important thing, this will be much more scalable as well. So, without further do let’s start this Guide of Chrome Extension with Vue.Js.
Create Chrome Extension with Vue.Js
I’m assuming if you’re reading this blog then that means you’re familiar with VueJS and have already setup it. So, I will not go through setup like how to install @vue/cli and etc.
Create a Vue Project:
First of all you need to create a Vue project that you can easily create by following command. One thing, you should remember that your project name will be your default chrome extension name. Although you can change it later. So, I would like to give it the name – codechit.
vue create codechitWhile you are creating your project then select Vue 2 or 3 [with babel] preset.

Once you’ve created your project then go inside that project and open it in vs code or other editor.
Installing and adding Vue Cli Plugin Chrome extension:
Now you will have to install a npm package(vue-cli-plugin-browser-extension) gloablly. You can install this plugin by using:
npm i -g vue-cli-plugin-browser-extensionThe above command will add this package globally. We will use this plugin to tweak our vue project to and then our Vue project will turned into a chrome extension.
Now, it’s time to use add this plugin to our Vue Project(codechit) that we just created. So, just get inside your project and run following command:
vue add browser-extensionOnce you would enter the above command then it will ask you for few things, whether you want to keep it or not.
[allow] means I’m recommending you to allow these options from these.
- Background script [allow]: This script will always run in background. and It has access of most of Chrome APIs. And they listen events from content-scripts. (Read More)
- Browser Action Popup [allow]: This will add popup html to your extension. This is a small popup that you get when will click on extension from top.
- Options Page[allow]: This will add options page to your extension that you can use to create settings page later. Although we will not use it here in this guide.
- Content Scripts[allow]: This script will run on the any webpage you defined. If you want this script to run on every page then you can do that as well.
- Override Page[disallow]: I don’t much about it. I haven’t used it before. but you can read official docs for it.
- Standalone Tabs[disallow]: This will give you access of tabs of your browser.
- DevTools Tabs[disallow]: To get access of Developer tools.
This was just a rough explanation of what these things are. But you can read more about these above terms from Google Chrome Extension Docs.
Options to Enable:

Once you’ve selected options you want then just press enter. And then it will ask you for “Generate new signing key?”[N]. Simply enter N and then press enter again. And it will add all the required files to your project that a chrome extension need.
One important thing, you have to delete two files from root folder of your Vue project, which is -> [main.js and App.vue]. And remember only delete App.vue and main.js file from “src” folder. These same files will be available inside other folders as well e.g “popup“, etc. So, don’t delete files from these folders.
Important Step
Now as we’ve deleted default entry point of Vue project. So now, when you will run `npm run serve`. then instead of running vue project. It will start compiling your extension in new “dist” folder. where all of your ready to use extension file will be available.
So, simply run following command to build dist folder, which we use as an extension.
npm run serveBut when you will run above command for first time then you might get this error. Because we declared but haven’t used few args in background.js
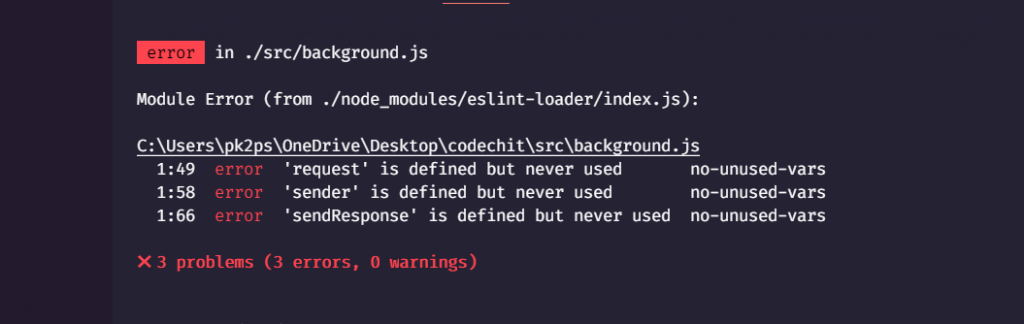
But you can solve this error by removing params from function(request, sender, sendResponse) because we’re not using it, like this:

Now again run the command: `npm run serve` and you dist folder will be available after compilation. Now you can add this extension inside your Chrome browser
Adding our extension to Chrome:
Now open you chrome browser and enter chrome://extensions/ in your search bar and here “enable” developer mode.

Once you’ve enabled the Developer mode then in left side new button will be available called Load Unpacked. Simply click on it and select your dist folder from your project.

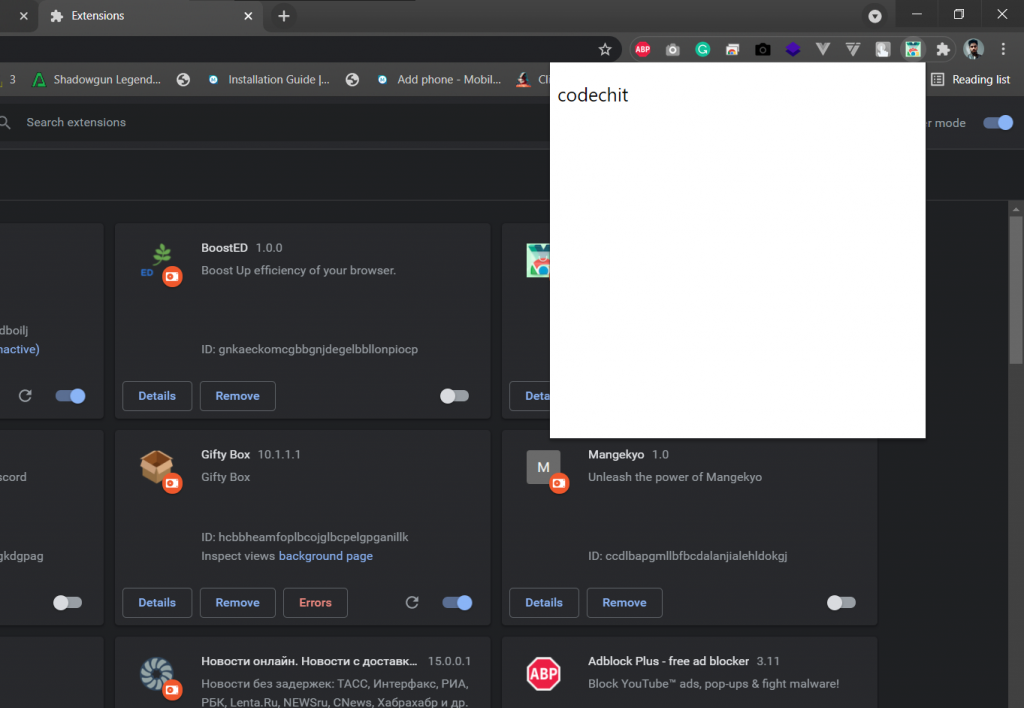
Once you’ve selected your dist folder then your extesnion will be available in your browser.

Now if you would click on your extension from top menu then you will see something like this[Default content Or hello world].
Now let’s edit our popup/App.vue file to see, whether we are able to change the content of this or not.

Now refresh your extension and then click on icon and now you will see something like this.

Additional
If you want to load your conten-script.js file every page where you want to visit then a
So, that’s it. I will not go into the depth of how to use each and every api and features of chrome extension. Because this article is about just to show you that you can create an extension in Vue.Js framework.
You may also like: Deploy wordpress on Cloud Hosting DigitalOcean
And If you want to read more about how chrome extension work then you refer Google Chrome Extension Dev Docs for that.
So, I hope you all liked this article. If yes then please don’t forget to share this article with your friends. You can also subscribe our blog to get notification related to such articles.
Thanks to read…