
Hello everybody, today we’re going to build a Discord BOT. In which we will integrate our Chat GPT 3. And we’re going to build this on Node.js platform but fundamentals are same, so you can apply it anywhere.
What you will learn in this article:
- How to build and install a Discord Bot.
- How to use and inegrate an Open AI model(chat gpt) with your discord bot to answer your questions.
Although whatever I am gonna show you in this article is just a basic way in which you can build up and running discord bot. So, that’s why you can further optimize and fine tune as per your need.
Setup of your discord bot
First of all, we’re going to setup our discord bot and will install it inside our server. So, make sure you do own a server. If you don’t have one then you can create it for free. Now, just follow me step by step.
Now go to discord developer portal and sign-in, if you don’t have an account then create a new one. And then go to this url Discord Application. Once you’ve created your account then you need to create one Application. you can see that little button in top right corner. After you will see something like this.
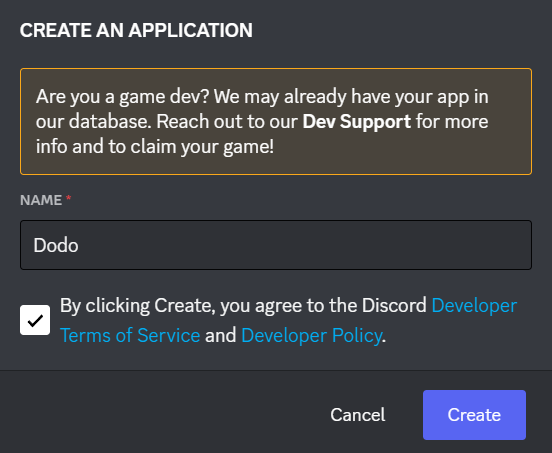
I am keeping the name of my bot dodo, but make sure to name it unique. If you won’t then it will give you an error at the time of creating new BOT like this:

So, now I have changed the name of discord bot from DODO to dodo_line. So that I can create a bot. Now just go inside Bot section and click on Build bot:

After that you will see dasboard of bot something like this:
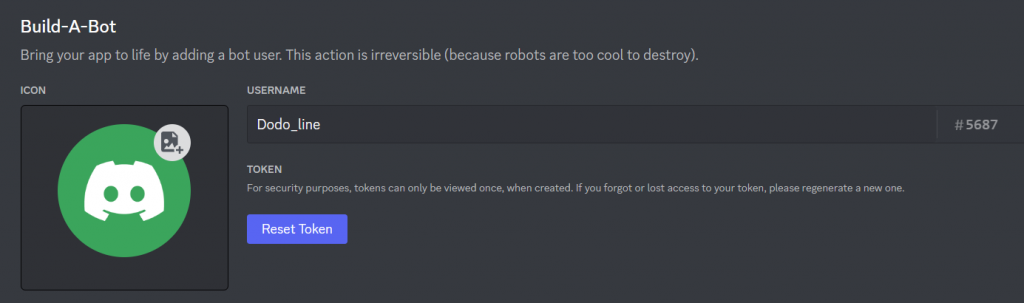
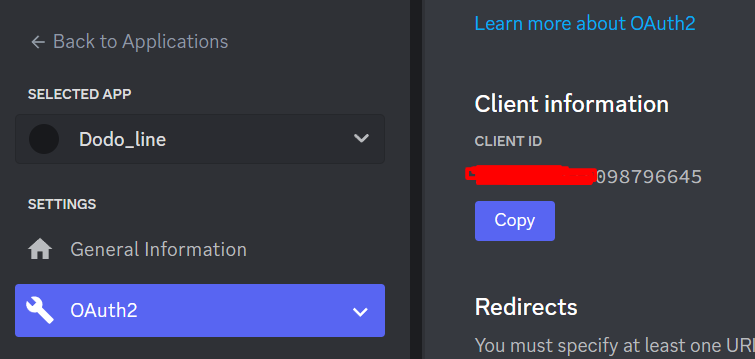
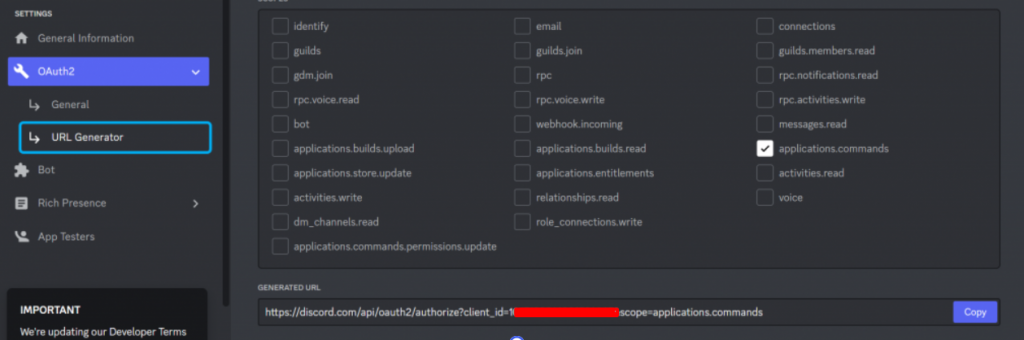
Now, click on Reset Token button to generate new token and save it somewhere with name of BOT_TOKEN, we will need this later. Once you’ve generated and copied your BOT_TOKEN After then, you have to go inside OAuth2 section and here copy CLIENT_ID and store it somewhere as well.
After that go inside URL Generator section and tick application.commands option, so that we can register our commands and allow this bot to read those. And just copy the Generated Url and open this in new tab.
When you’ll open given url in new tab then you’ll see something like this, which is basically saying which server you want to give this bot an access to. So, choose your own server and click Authorise button.

Once you would do that, then it will add this bot inside your server. Although it won’t work right now. As we’ve not written single line of code to register and manage our command. And more important our bot is not even live right now. Now lets jump to that section.
Writing code of discord bot in Node.js
In this part, we’re going to setup our nodejs project to take our bot online. As of now, it’s now online. We will write code to register and manage those commands. And for that we’ll be using a package called discord.js
**Folder Sturcture**

dodo
├── bot.js // To mange bot and login with bot (kind of index file)
├── chatGPT.js // To manage fetch queries from open ai
├── register.js // To register command
├── package.json

└── .env // things like BOT_TOKEN, OPENAI_API_KEY, CLIENT_ID
So before writing code lets install required package using following command.
npm install dotenv openai discord.js1. Register.js – register discord command:
Once you’ve installed then we can start writing. I am gonna start with registering command, so for that create a file called register.js in your root folder and add following code.
const { REST, Routes } = require('discord.js')
require('dotenv').config();

const commands = [
    {
      name: 'ask',
      description: 'Replies with Pong!',
      options: [ {
        "name": "prompt",
        "description": "Ask question",
        "type": 3
      }]
    },
  ];

const rest = new REST({ version: '10' }).setToken(process.env.BOT_TOKEN);

async function discordRegisterCommand() {
    try {
        console.log('Started refreshing application (/) commands.');

        await rest.put(Routes.applicationCommands(process.env.CLIENT_ID), { body: commands });

        console.log('Successfully reloaded application (/) commands.');
    } catch (error) {
        console.error(error);
    }
};


module.exports = discordRegisterCommand;
Here we’re basically, defining our command called /ask, so user have to type this command to invoke this section. Inside this command, we’ve defined prompt, you can consider it like a text field(or parameter). So when user will type /ask then he can choose this option named prompt, and once he will click on that a text field would appear, which I will show you enter. And then you can read text data passed in this prompt section. there is also one more property called type, basically it is used to define type of data that you’re expecting, here, it means that it is STRING type data.
After that we’ve created one instance of REST from discord.js package and set our BOT_TOKEN to it. After that we’ve written our function named discordRegisterCommand it’s promise in which we’re making put request using our rest instance.
It simply means go and register these commands at Bot(Dodo) with given CLIENT_ID. And finally we’ve exported this function.
2. chatGPT.js: to fetch answers of given prompt
This function will take one argument as a string, which will be user entered prompt. And we’ll make further request to openai server to fetch result or answer.
const { Configuration, OpenAIApi } = require('openai');
require('dotenv').config();
/**
 *
 * model: String(Model Code)
 * prompt: String(Question)
 * maxWords: Integer(Amount of results)
 * apiKey: String(Api key given by an user) // Temporary
 */

async function chatGPT(prompt) {
	const configuration = new Configuration({
		apiKey: process.env.OPENAI_API_KEY,
	});
	const openai = new OpenAIApi(configuration);

	const completion = await openai.createCompletion({
		model: 'text-davinci-003',
		prompt: prompt,
		max_tokens: 1500,
	});
	// console.log(completion.data.choices[0].text);

	return completion.data;
}

module.exports = chatGPT;
In this code, we’re using openai and written one function that is taking prompt(string) as an argument. Inside configuration part, you need to enter API KEY of Open AI. If you don’t have one then go to openai website and create new one: Click Here or View or generate API Key.
Once you’ve done that, now we’re making a completion request. Here I’ve defined model as text-davinci-003 which is one of the powerful model at the time of writing this article. and Inside prompt, just pass your prompt. max_tokens means max words that a result can go up to and now simply export this chatGPT as function as well.
3. bot.js: Main execution file or entry point
This one is our final stop, here we will define what to do, when someone has invoked our /ask command.
const { Client, GatewayIntentBits } = require('discord.js');
const chatGPT = require('./chatGPT.js');
const registerCommand = require('./register');
require('dotenv').config();

const client = new Client({ intents: [GatewayIntentBits.Guilds] });

registerCommand().then(() => {
    client.on('ready', () => {
        console.log(`Logged in as ${client.user.tag}!`);
      });

      client.on('interactionCreate', async interaction => {
        const prompt = interaction.options.getString('prompt');
        console.log(  interaction.message )
        console.log(  interaction.options )
        if (!interaction.isChatInputCommand()) return;
        if (interaction.commandName === 'ask') {
          await interaction.deferReply();
          const response = await chatGPT(prompt);
          await interaction.editReply(`**Question:** ${prompt} \n ${response.choices[0].text}`);
        }
      });

      client.login(process.env.BOT_TOKEN);
})
In the above code, we’ve imported client from discord.js and created one instance of that. After that we’re calling our registerCommand function. And once it finishes then we’re regestering rest of the events, e.g ready, interactionCreate, etc.
interactionCreate event gets triggered when someone uses /slash command. In that case this hook will get run, here we’ve defined if commandName is ask then call interaction.deferReply(). we call this function whenever we’re doing something which might take time or else your discord bot will close this gate after some time. So, we’ve added this because we’re going to fetch our result from openai, and this one might take 4-5 seconds and sometimes even more than that. that’s why we’ve added this, and once we got our result then we’ll edit our reply with result we got. Although, I formatted this according to my need, but you can do it as you want.
And at last, we’ve added called one method login to login inside our bot. It will get triggered every time when we will start our server.
4. Minor Configuration
Inside package.json, add one more script { “dev”: “node bot.js”}(optional), but it’s your choice. And also don’t forget to add all required key inside your .env file:
BOT_TOKEN="<bot_token>"
CLIENT_ID="<client_id>"
OPENAI_API_KEY="<open_api_key>"
Once you’ve done that then start the server using npm run dev or node bot.js. That’s it now we’re ready to test our bot, so let’s go.
Testing discord bot:
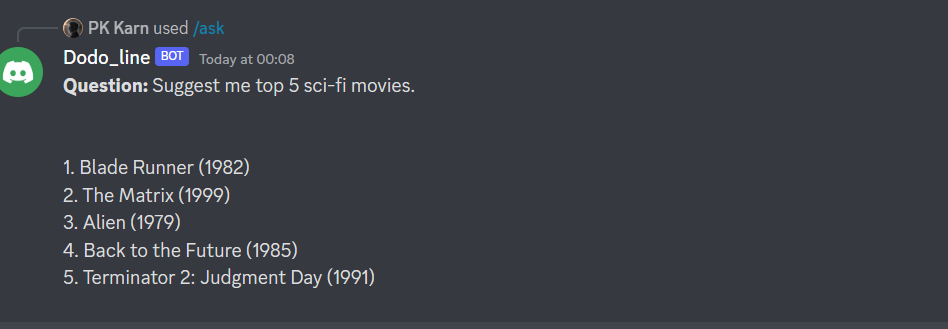
Go inside your discord server, and in any channel type /ask, then you will see an option like this:

Now click on it, and choose prompt answer to enter your question.

And after a moment, it will give you the result like this:
So, You see how easy it was. And now, you’ve to keep your bot server running only then it will work. For that you can host it on cloud server e.g AWS, linode or digital ocean, etc.
I have also upload code on my github, you can take a look on that https://github.com/pkkarn/dodo_link.
You may also like: Use wikidata to query structured data
So, that’s it for today, I hope you liked this article about how to build discord bot with chat gpt 3. If yes then please don’t forget to upvote and share this with your friends.
Thank’s for reading 🙂